Showing posts with label After Effects. Show all posts

Tuesday, 18 January 2011

After Effects workshop 5

hmidfobmgoxf

Available sounds.


nxgxbgxnf

Audio in timeline.


nfoz;bmdz

Audio levels.


buielanfo;ea

Shorten audio.


gzndzgfzbfd

Loop.


Tuesday, 11 January 2011

After Effects workshop 4

Effects and presets 
These are pre-made and can be adjusted. Here is a pre-set applied to a After Effects text layer with no adjustments made.

Timeline of explosion 2 effect


Effect with no changes made to keyframes.


To edit individual points of the effect, press U to display all animated properties or press UU to view all modified properties. These can be hard to manipulate how you want something to look as it is hard to manipulate. Mick suggests creating them yourself rather than using effects.

All animated properties (U)


All modified properties (UU)


Effect with keyframes moved to creat different timings.

Switches
Shy switches makes a layer visable in your composition but not in the layer panel. Simplifies the layer panel. Really useful for backgrounds. Individual switch for each layer and bigger switch to apply this to the layer panel. Motion blur works the same and needs to be selected on individual layers as-well as on whole composition

Shy switch for selected layers.

Shy switch in use, simple layer panel. 


Creating a pendulum
Create a solid layer and then double click on ellipse tool to make it a circle (mask). Then create 3 keyframes using the rotation transformation and add motion blur to create this...


To view speed graph click icon and this can help slow doesn't and speed up motion. Can also add ease in and ease out.

Speed graph with no changes.

Thursday, 6 January 2011

My typography

I feel like I'm not really producing anything interesting... Sure, I am learning the software but I think I can do better. Drawing out my own text for this and importing into Illustrator, creating outlines and then importing into After Effects to animate might make me get more interested in this project and create more effective work by using simple techniques. Here is a quick example I made creating my own type on Illustrator...

I think what has inspired me to do something dofferent is getting bored with the same old kinetic typography (I feel like once you've seen one good one, I've seen them all) this ABC Yo-Yo video amazed me and is the type of video I would love to do... sooo why arn't I?! Creating my own text seems like the perfect compromise and will be something I can put into my digital portolio while still keeping in touch with the direction I want to go into, typography.

IMAGE OF SKETCHED TYPE


This is only very quickly done to illustrate how I could use handrawn/my own designed type in this way. For this in Illustrator I drew my text (extremely quickly!) using the Pencil Tool and then selected expand (as like create outlines on type normally) this could then be pasted onto a new solid layer in After Effects and manipulated as with any other Illustrator type import.

Animate stretch

Creating text in After Effects and using the animate selection I have tried to experiemtn with lots of different forms of stretching based on these storyboards...

STORYBOARD

I have changed them slightly due to not knowing how to create some effects! I made the animations in parts to make it easier for me to understand...


I then added more animations...


Composition timeline with keyframe markers.

Screengrab 0.00s

Screengrab 1.00s

Screengrab 2.00s

Screengrab 3.00s

Screengrab 4.00s

 Screengrab 4.24s

I am really happy with this and hope to develop the initial idea further.

Tuesday, 14 December 2010

After Effects workshop 3

Image of notes.

Creating text within After Effects

Type created in AFter Effects.


nveor;anvr

Transform anchor point.


nuor;eanovpr

Pan behind tool (y).


gtrstrbf

More text options.


bfuie;vai

Source text.


bhueptarioe;a


Source text from Hazel Gage on Vimeo.

hteaheahae

Animate properties.


nviaer;voe

Anchor point keeps position.


veabrtbea

Animate position per character.


gtdbgrbs

Based on.


btebtrt


Animate position from Hazel Gage on Vimeo.

bvuow;nevipw


Opacity from Hazel Gage on Vimeo.


fyukgu,bi


Scale from Hazel Gage on Vimeo.

Friday, 10 December 2010

After Effects workshop 2

Image of notes.


Preparing Assets in Photoshop
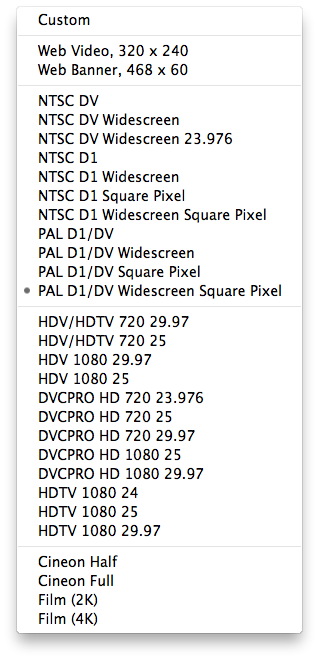
New.


Can select the correct size appropriate for screen by selecting the right preset size. This does not need to be the same size as composition in After Effects... (if you want it smaller than full screen).

Show guides for action safe and title safe (cmd + ;).

Title safe and action safe in After Effects.


The title safe and action safe guides will be really helpful in each application so that I can create key frames in the areas of screen that will have most impact for my audience.

Text created in Photoshop.


By creating the type inside the title safe area, I cropped my image down and made sure the backgraound was transparent.

Photoshop text imported as footage into After Effects.


With all the type on the same layer on Photoshop, it is hard to edit individual aspects of the word. This has been imported as Footage.
Layer via cut (cmd + sft + j).


In Photoshop I created all aspects of this word into seperate layers and then imported into After Effects as a Composition.

Photoshop text imported as composition into After Effects.


By having these letters on seperate layers I could edit each of these individually in After Effects.


Photoshop import on After Effects from Hazel Gage on Vimeo.


Preparing Assets in Illustrator

New.


Can also use Illustrator to create assetts to be imported into After effects. I think I would be more suited to using Illustrator for this project as I find it easier to use and I can edit the letters beofre importing. by the size I can select PAL with widescreen. No pixels (square or rectangular) need to be selected as Illustraor doesn't use pixels.

New Illustrator artboard.


The Illustrator artboard uses the title safe and action safe areas also.

Text on seperate layers.


By having the letterforms on seperate layers, I can edit them individually in After Effects.

Pixelated.


Illustrator import on After Effects from Hazel Gage on Vimeo.


Even though Illustrator uses vectors, assetts will still become pixelated if transformed in After Effects. This is because After Effects rasterizes it as it is pixel based.  To diminish this, you can use they layer switches.

Layer switches.


The layer switch (for vector layers; continuously rasterize) which looks like a little sun can be turned on for vector layers and will continuously rasterize that layer, this means it will not pixelate. This will not increase the file size but will increase how long it takes for a RAM preview. I will definately be using Illustrator to create assetts and then use this layer switch to make the animation look more slick.

By importing an assett into After Effects as Composition - Retain Layer Sizes teh anchor point for each layer in in the centre of that specific layer, and not the composition.

Masks
I wanted to stretch the individual serifs of a letterform in After Effects for one of my keyframe storyboard ideas. Mike suggested that I would need to outline my text in Illustrator before I imported it into After Effects. I need to create a new solid layer, the size of the composition and paste the path, from Illustrator onto this. I will now have all my paths from Illustrator and can drag edit them as I would do in Illustrator.


Mask from Illustrator to After Effects from Hazel Gage on Vimeo.

Wednesday, 8 December 2010

After Effects workshop 1

Image with notes

After Effects workspace.


Panels
  • Project Panel is where you store all the assests (library if assets) to be used in your animation.
  • Timeline Panel is the area where you arrange assets of animation. This decides when something happens. 
  • Composition Panel allows us to see our animation. 
Spacial and temporary
Spacially is the movement (where) and temporarily is the time aspect (when).

Presets.
Composition settings (cmd + n)


Pixel aspect ratio
Must use PAL at 25 frames a second as this is the UK standard and Photoshop uses square (still images) video uses rectangular pixels (moving images) and for this project the format is 16:9 which is widescreen.

New solid layer (cmd + y)

Solid layer.


Now have a new 'solids' folder in the project panel and have a representation of this new solid layer over the 5 second duration in the timeline panel. Still images automatically last for the whole animation duration. I can move this 'solid layer' around in the frame (spacially), and also adjust the time length of it in the timeline panel (temporarily).

Simple animation.


By repeating layers and adding new ones and also altering them spacially and temporarily I can create a simple animation. By using the RAM preview button in the preview panel, you can watch the animation at real time (cannot be 100% certain it is playing in real time just by using the play button).

Work area bar.


Work area bar
By using the work area bar we can select a small section of the animation to demonstrate.


Untitled from Hazel Gage on Vimeo.


Keyframes

Layer properties.


Layer Properties
By using the layer properties you can add transitions and effects like position, anchor, rotation, scale and opacity.


Untitled from Hazel Gage on Vimeo.


You can also select more properties and layers to edit at once by using the keyboard shortcuts to create this...


Untitled from Hazel Gage on Vimeo.